
Amanco rebuild early days
+7
Robotstar5
chuffchuff
Dazzla
blue cat
chrismac
Appletop
philipagri
11 posters
Page 2 of 2
Page 2 of 2 •  1, 2
1, 2
Re: Amanco rebuild early days
![]() by Woodsman Sun 8 Mar 2020 - 10:21
by Woodsman Sun 8 Mar 2020 - 10:21
chuffchuff wrote: I'll need to suss out how to send a personal message now.
Or click on the MP button underneath profile on right hand side.
Don't ask me why it's MP not PM ?
_________________
Regards Paul
Tha can alus tell a Yorkshireman - but tha can't tell him much.

Woodsman- Admin
- Posts : 2691
Join date : 2014-08-24
Age : 73
Location : God's own county
Re: Amanco rebuild early days
![]() by Robotstar5 Sun 8 Mar 2020 - 10:34
by Robotstar5 Sun 8 Mar 2020 - 10:34
Not sure how you plan to weld them, but if it was me I'd make the spokes a couple of mm shorter so they sit below the level of the rim, bevel the rim holes then you can puddle weld them in followed by linishing the welds smooth.
_________________
Stuart
Robotstar5- Life Member

- Posts : 1087
Join date : 2018-09-25
Re: Amanco rebuild early days
![]() by chuffchuff Sun 8 Mar 2020 - 10:53
by chuffchuff Sun 8 Mar 2020 - 10:53
Hi Stuart. I turned up the amperage and burned in the weld then ground back to the wheel profile. Your right though I should really have shortened the spokes. I took the lazy option
I took the lazy option
chuffchuff- A true Stationary engine owner
- Posts : 141
Join date : 2020-01-09
Location : Aberdeenshire
Re: Amanco rebuild early days
![]() by chuffchuff Mon 30 Mar 2020 - 17:35
by chuffchuff Mon 30 Mar 2020 - 17:35
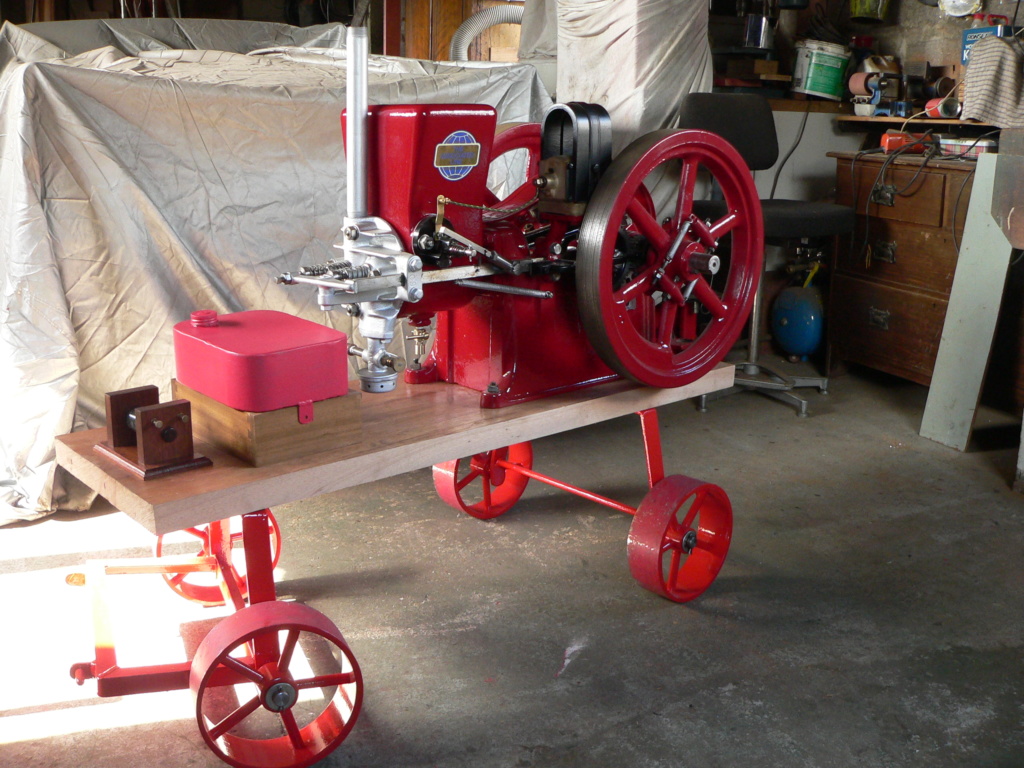
Nearly there now with just the fuel tank to paint and fit.
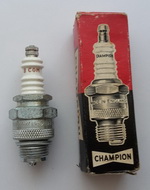
I guess I'll go with the coil for the first start as not sure of how healthy the mag is.
I guess I'll go with the coil for the first start as not sure of how healthy the mag is.

chuffchuff- A true Stationary engine owner
- Posts : 141
Join date : 2020-01-09
Location : Aberdeenshire
Re: Amanco rebuild early days
![]() by Robotstar5 Mon 30 Mar 2020 - 22:36
by Robotstar5 Mon 30 Mar 2020 - 22:36
Looking good 
_________________
Stuart
Robotstar5- Life Member
- Posts : 1087
Join date : 2018-09-25
Re: Amanco rebuild early days
![]() by Woodsman Tue 31 Mar 2020 - 13:18
by Woodsman Tue 31 Mar 2020 - 13:18
Very nice! Well done that man.
_________________
Regards Paul
Tha can alus tell a Yorkshireman - but tha can't tell him much.
Woodsman- Admin
- Posts : 2691
Join date : 2014-08-24
Age : 73
Location : God's own county
Re: Amanco rebuild early days
![]() by dunitrong Tue 31 Mar 2020 - 20:44
by dunitrong Tue 31 Mar 2020 - 20:44
That looks well. Like how you raised the engine up on the trolley.Arthur
dunitrong- Expert

- Posts : 71
Join date : 2014-05-29
Age : 79
Location : Pontefract
Re: Amanco rebuild early days
![]() by mattblack Tue 31 Mar 2020 - 21:27
by mattblack Tue 31 Mar 2020 - 21:27
That's looking very smart... almost a shame to run it!
_________________
Specialist in precision guesswork.

mattblack- Life Member
- Posts : 829
Join date : 2019-06-21
Location : Leicester, me duck...
Re: Amanco rebuild early days
![]() by blue cat Thu 2 Apr 2020 - 19:14
by blue cat Thu 2 Apr 2020 - 19:14
I'm a bit concerned that you could pull the front wheel assembly off the wood of the trolley especially on a grass field. There's a big leverage between the lower handle attachment point on the front axle and the pivot on the trolley. I would fit a stabilising bar between the front axle and either the wood chassis or rear wheels. The bar should be pivoted at the front end on the same centre as the axle. Just my opinion....
_________________
blue cat
blue cat- Life Member
- Posts : 1044
Join date : 2013-10-10
Re: Amanco rebuild early days
![]() by chuffchuff Tue 7 Apr 2020 - 18:08
by chuffchuff Tue 7 Apr 2020 - 18:08
Hi Blue Cat. No need to be concerned the axle is VERY solidly fixed I'll possibly post a photo to show the way it's secured. 
chuffchuff- A true Stationary engine owner
- Posts : 141
Join date : 2020-01-09
Location : Aberdeenshire
Re: Amanco rebuild early days
![]() by maryalice Tue 7 Apr 2020 - 18:23
by maryalice Tue 7 Apr 2020 - 18:23
chuffchuff wrote:Hi Blue Cat. No need to be concerned the axle is VERY solidly fixed I'll possibly post a photo to show the way it's secured.
I agree with blue cat, looking at the section of the axle supports they will fold very easily.
Maryalice
maryalice- Life Member
- Posts : 1235
Join date : 2010-01-23
Age : 70
Location : Bedfordshire
Re: Amanco rebuild early days
![]() by chuffchuff Tue 7 Apr 2020 - 20:47
by chuffchuff Tue 7 Apr 2020 - 20:47
Ach, Maryalice your wrong to agree as you can have no real idea of the underside fixing design or the sectional size of the materials used. I'm fully confident there won't be a problem unless I decide to pull it over rough grass at over 50 MPH of course. Lol. 
chuffchuff- A true Stationary engine owner
- Posts : 141
Join date : 2020-01-09
Location : Aberdeenshire
Re: Amanco rebuild early days
![]() by maryalice Tue 7 Apr 2020 - 21:10
by maryalice Tue 7 Apr 2020 - 21:10
Sadly that means I wasted nearly 50 years as a mechanical engineer, I wont bother you with dimensions etc but its a doddle to calculate what sizes of angle iron you have used, you just measure a known part and by comparing it with the real thing you can scale up thus obtaining the sizes of your trolley.
There I shall leave it.
Maryalice
There I shall leave it.
Maryalice
maryalice- Life Member
- Posts : 1235
Join date : 2010-01-23
Age : 70
Location : Bedfordshire
Re: Amanco rebuild early days
![]() by chuffchuff Tue 7 Apr 2020 - 22:01
by chuffchuff Tue 7 Apr 2020 - 22:01
I'd better pull it to bits and start again then. 


Seriously though I do agree with all that the draw-bar looks to be on the feeble side it was constructed from the stock pile of materials that I have lying around and if I'd had suitable heavier material around I'd have used it I agree that I should probably fit vertical bracing's and I may do so yet. However I did carry out a fourteen stone+ static and dynamic load test with me standing/jumping on the draw-bar frame  it didn't break or deform so hopefully will do the job for a while at least.
Thanks for you observations though.
Seriously though I do agree with all
that the draw-bar looks to be on the feeble side it was constructed from the stock pile of materials that I have lying around and if I'd had suitable heavier material around I'd have used it I agree that I should probably fit vertical bracing's and I may do so yet. However I did carry out a fourteen stone+ static and dynamic load test with me standing/jumping on the draw-bar frame Thanks for you observations though.
chuffchuff- A true Stationary engine owner
- Posts : 141
Join date : 2020-01-09
Location : Aberdeenshire
Re: Amanco rebuild early days
![]() by chuffchuff Wed 8 Apr 2020 - 7:01
by chuffchuff Wed 8 Apr 2020 - 7:01
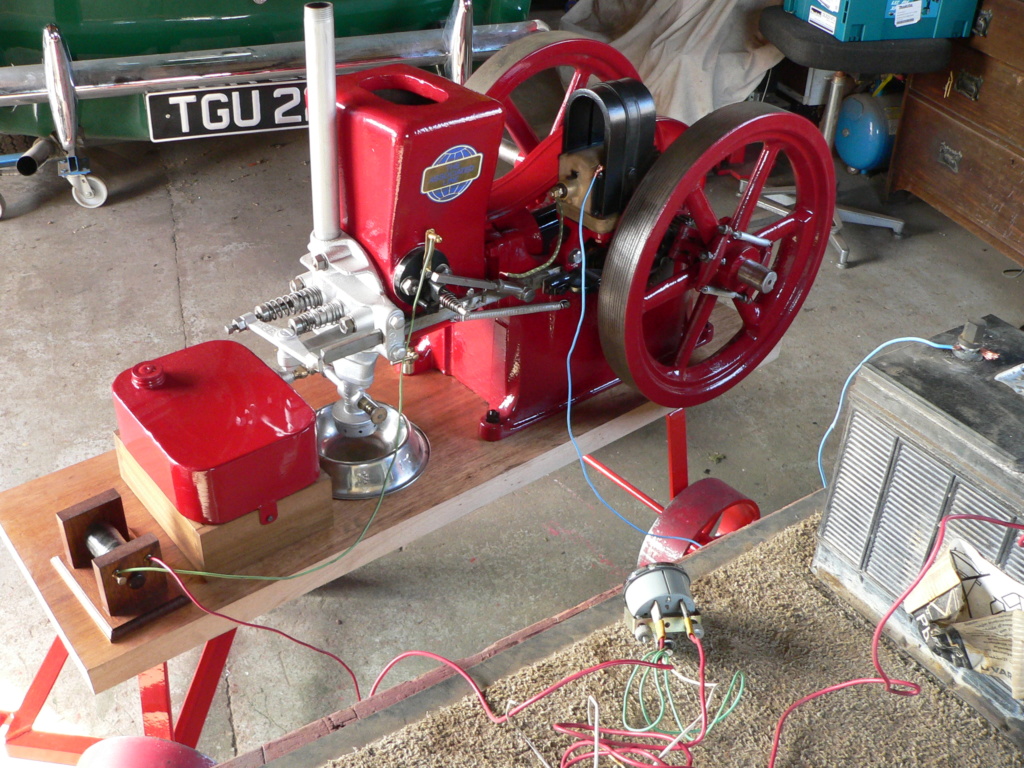
I started the engine for the first time yesterday and happily it burst into life on the very first crank-up.
I hooked up the L.T. coil for the start then with it running I quickly disconnected the coil and swapped over to the mag, very pleasingly it continued to run as I did have some doubts on the condition of the mag. I'll now make up a period looking knife type switch so that I can swap over from battery and coil to magneto. I haven't tried starting it from the mag but I believe this required a good turn of speed to get the mag operational?
Prior to the startup I hooked up a ammeter to the coil this showed me when the igniter points were opening and closing and where the timing was set to. The coil draws around 10 amp on a 12 V supply.
Prior to start-up of course I was a not sure at what speed the governor would cut-in so was ready for a quick ignition disconnect however this was unnecessary as the speed was OK if a little on the fast side.
All is well with the engine apart from the fuel tap leaking past the cork seal, not to be unexpected really as the fuel tap had lain in a box of old brass fitting for over thirty years. I was pleased to see that the engine runs just fine with no check valve in the fuel line. As expected.
The dog bowl was placed under the mixer to catch excess fuel as I intentionally flooded the intake to ensure a rich mixture for the first start. Don't worry though the dog got her bowl back washed in time for dinner.
I guess I could say now all revved-up and nowhere to go due to this dreaded corona virus.


chuffchuff- A true Stationary engine owner
- Posts : 141
Join date : 2020-01-09
Location : Aberdeenshire
Re: Amanco rebuild early days
![]() by Robotstar5 Wed 8 Apr 2020 - 10:38
by Robotstar5 Wed 8 Apr 2020 - 10:38
Looks good
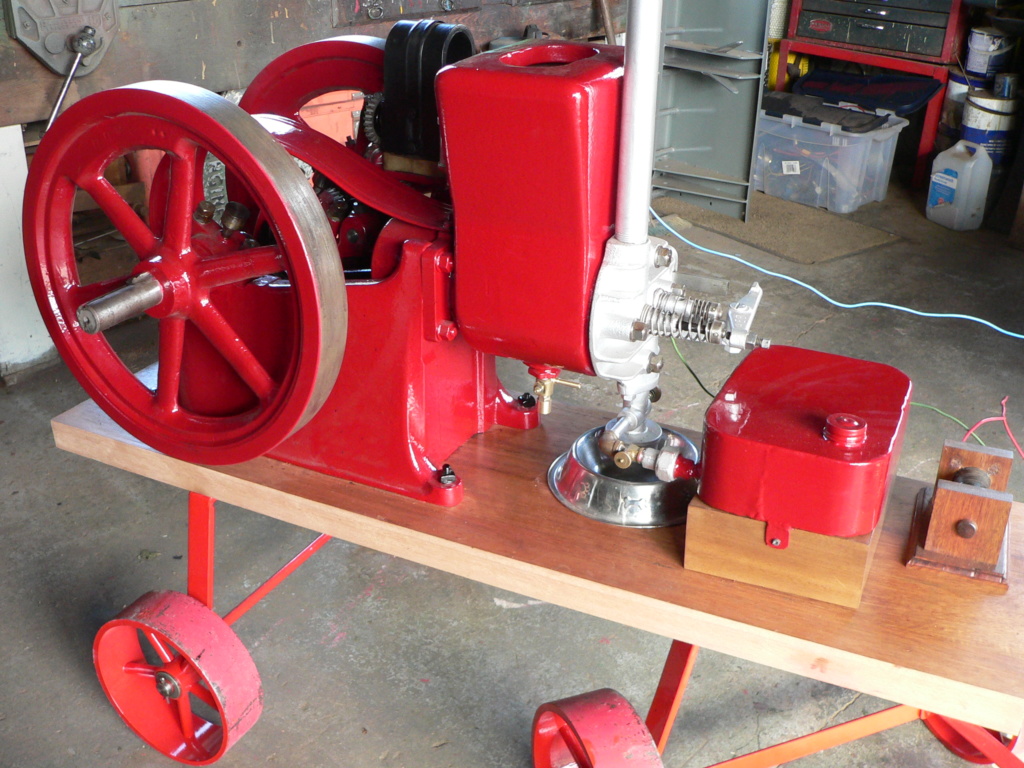
What wood have you used for the base?.
What wood have you used for the base?.
_________________
Stuart
Robotstar5- Life Member
- Posts : 1087
Join date : 2018-09-25
Re: Amanco rebuild early days
![]() by chuffchuff Wed 8 Apr 2020 - 13:13
by chuffchuff Wed 8 Apr 2020 - 13:13
Hi Stuart,
The base was made from a unit top that I used to have in my sitting room a very long time ago, it's actually three planks of wood that are jointed, the jointing was done by my late father. I think from memory the wood was "Meranti". If you look closely at some of the pictures you may be able to see the tongue insert between the grooved joints. I intend to make hardwood end caps to hide this.
All materials in the trolley was from stock I have lying around apart from the wheel rims that I machined from sections of a scrap hydraulic accumulator bottle I bought, as it turned out this wasn't a great idea as the cut bottle sections were found to be well out of round and needed a lot of machining to make them round, most of the cut-off sections had to be scrapped as they were just too far out of round.
chuffchuff- A true Stationary engine owner
- Posts : 141
Join date : 2020-01-09
Location : Aberdeenshire
Page 2 of 2 • 1, 2
Page 2 of 2
Permissions in this forum:
You cannot reply to topics in this forum|
|
|