
Villiers Mk10: Serial No. 522/182290
+2
Dougal
chiefy
6 posters
Page 2 of 2
Page 2 of 2 •  1, 2
1, 2
Re: Villiers Mk10: Serial No. 522/182290
![]() by Dougal Wed Mar 13 2019, 18:28
by Dougal Wed Mar 13 2019, 18:28
I wasn't completely happy with the crankcase and barrel so have been doing more wire-brushing on it to get it ready for paint......
Dougal- Born to be wild

- Posts : 30
Join date : 2016-09-28
Age : 61
Location : Herefordshire
Re: Villiers Mk10: Serial No. 522/182290
![]() by Robotstar5 Wed Mar 13 2019, 19:06
by Robotstar5 Wed Mar 13 2019, 19:06
Nice job on the name plate.
_________________
Stuart
Robotstar5- Life Member

- Posts : 1084
Join date : 2018-09-25
Re: Villiers Mk10: Serial No. 522/182290
![]() by Dougal Sat Mar 16 2019, 18:06
by Dougal Sat Mar 16 2019, 18:06
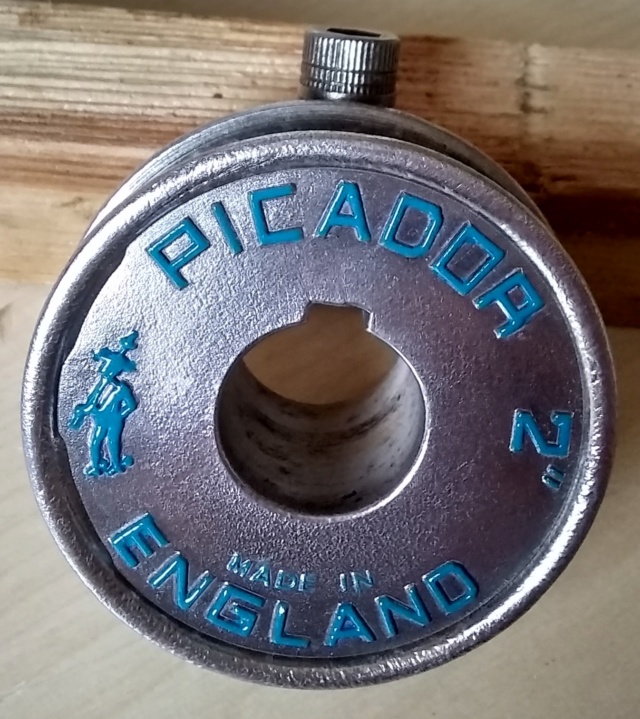
The drive pulley:
Before:
As I intend to paint the tinware in a blue colour, close to the original paint, I thought I'd tart the pulley up (after wire-wheeling) with some highlighting (used a Humbrol tinlet):
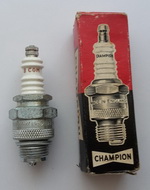
In the same manner, I also tarted up the spark plug connector - not sure if it's original, but I quite like it (and it's blue):
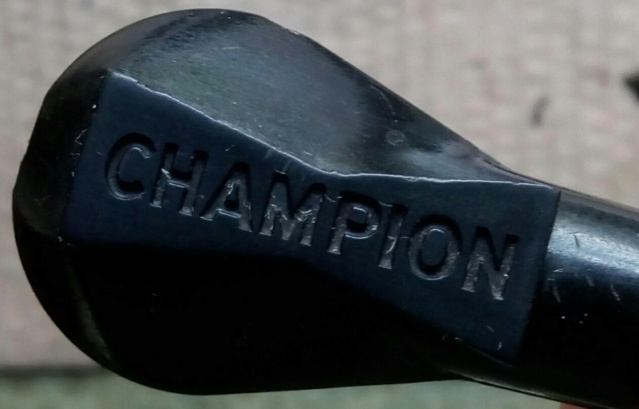
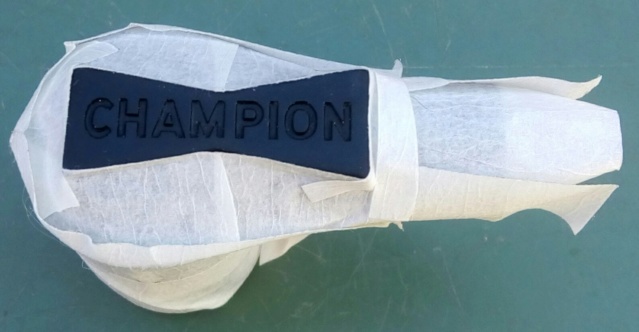

Before:

As I intend to paint the tinware in a blue colour, close to the original paint, I thought I'd tart the pulley up (after wire-wheeling) with some highlighting (used a Humbrol tinlet):

In the same manner, I also tarted up the spark plug connector - not sure if it's original, but I quite like it (and it's blue):


Dougal- Born to be wild
- Posts : 30
Join date : 2016-09-28
Age : 61
Location : Herefordshire
Re: Villiers Mk10: Serial No. 522/182290
![]() by Dougal Sat Mar 16 2019, 18:39
by Dougal Sat Mar 16 2019, 18:39
Also, the new piston rings arrived this morning from Athens (9 days) - they are spot-on (it's a pity the two UK suppliers I contacted couldn't have provided them at the same price).
I cleaned the piston grooves out with my Dremel using a small wire brush then a nylon brush, and fitted the rings in place (after cleaning them).... dropped some light oil over them as I won't be re-assembling for a while (old rings top, new rings bottom); need to remember to off-set the gaps by 120 degrees:


I cleaned the piston grooves out with my Dremel using a small wire brush then a nylon brush, and fitted the rings in place (after cleaning them).... dropped some light oil over them as I won't be re-assembling for a while (old rings top, new rings bottom); need to remember to off-set the gaps by 120 degrees:


Dougal- Born to be wild
- Posts : 30
Join date : 2016-09-28
Age : 61
Location : Herefordshire
Re: Villiers Mk10: Serial No. 522/182290
![]() by Dougal Sat Mar 16 2019, 18:44
by Dougal Sat Mar 16 2019, 18:44
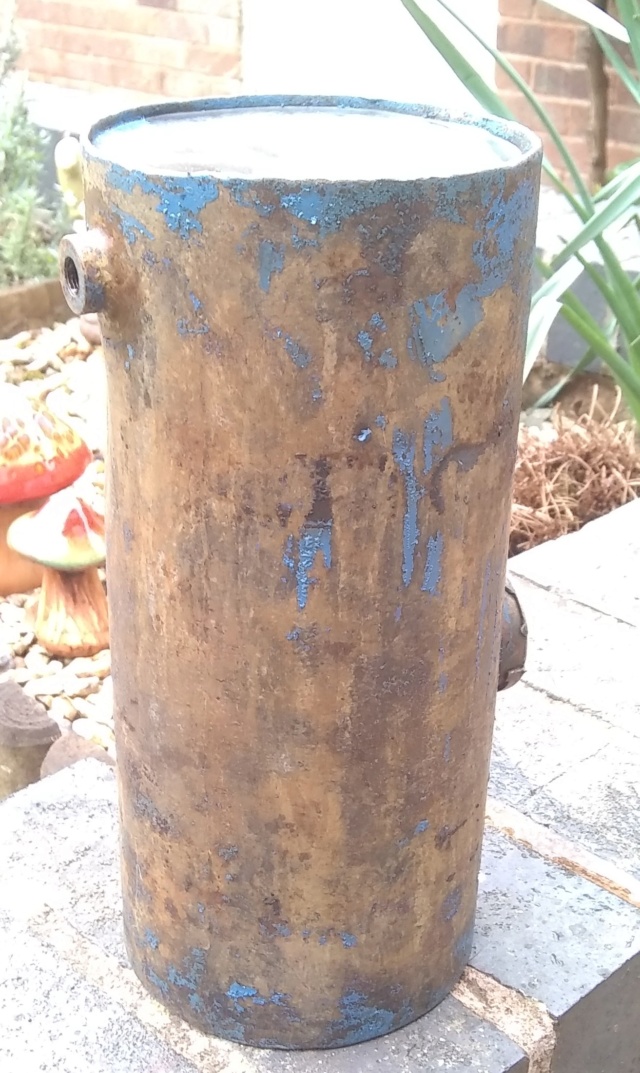
Started working on the fuel tank:
I managed to get a small dent in the top out, but there's a much larger one near the petcock area - I may fill this......

Main thing today was to start de-rusting the inside - vinegar treatment first:

I managed to get a small dent in the top out, but there's a much larger one near the petcock area - I may fill this......

Main thing today was to start de-rusting the inside - vinegar treatment first:

Dougal- Born to be wild
- Posts : 30
Join date : 2016-09-28
Age : 61
Location : Herefordshire
Re: Villiers Mk10: Serial No. 522/182290
![]() by Robotstar5 Sat Mar 16 2019, 23:16
by Robotstar5 Sat Mar 16 2019, 23:16
Citric acid crystals dissolved in hot water is good for de-rusting.
https://www.ebay.co.uk/i/181157485941?
https://www.ebay.co.uk/i/181157485941?
_________________
Stuart
Robotstar5- Life Member
- Posts : 1084
Join date : 2018-09-25
Re: Villiers Mk10: Serial No. 522/182290
![]() by Dougal Thu Mar 21 2019, 13:51
by Dougal Thu Mar 21 2019, 13:51
A bit more progress...
Crankcase wire-brushed, cleaned/de-greased and masked...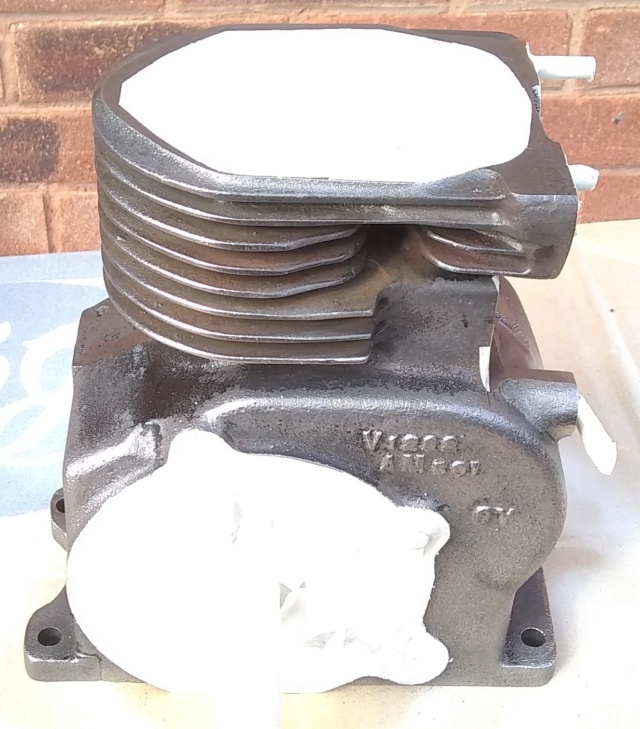
... then coated the barrel in the high-temperature paint - this appeared to cover and stick well, so used it as a primer coat for the rest of the crankcase (hopefully will be compatible with the black enamel-based top coat)
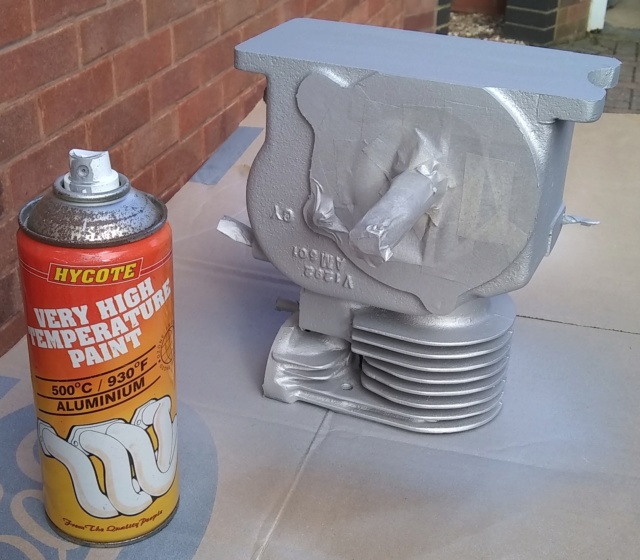
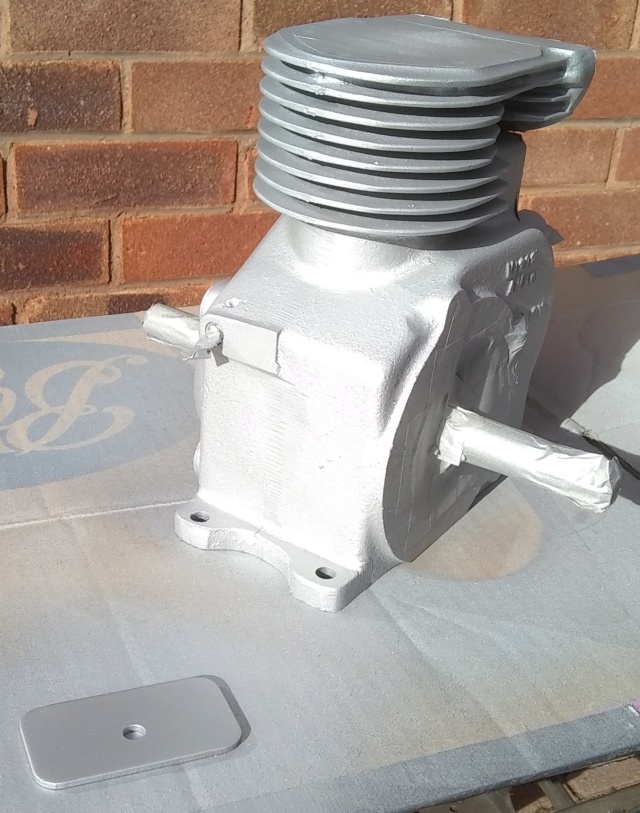
Force-cured using my high-temperature heat gun, and put to one side (after removing masking tape) awaiting top coat.
Crankcase wire-brushed, cleaned/de-greased and masked...

... then coated the barrel in the high-temperature paint - this appeared to cover and stick well, so used it as a primer coat for the rest of the crankcase (hopefully will be compatible with the black enamel-based top coat)


Force-cured using my high-temperature heat gun, and put to one side (after removing masking tape) awaiting top coat.
Dougal- Born to be wild
- Posts : 30
Join date : 2016-09-28
Age : 61
Location : Herefordshire
Re: Villiers Mk10: Serial No. 522/182290
![]() by Dougal Thu Mar 21 2019, 14:22
by Dougal Thu Mar 21 2019, 14:22
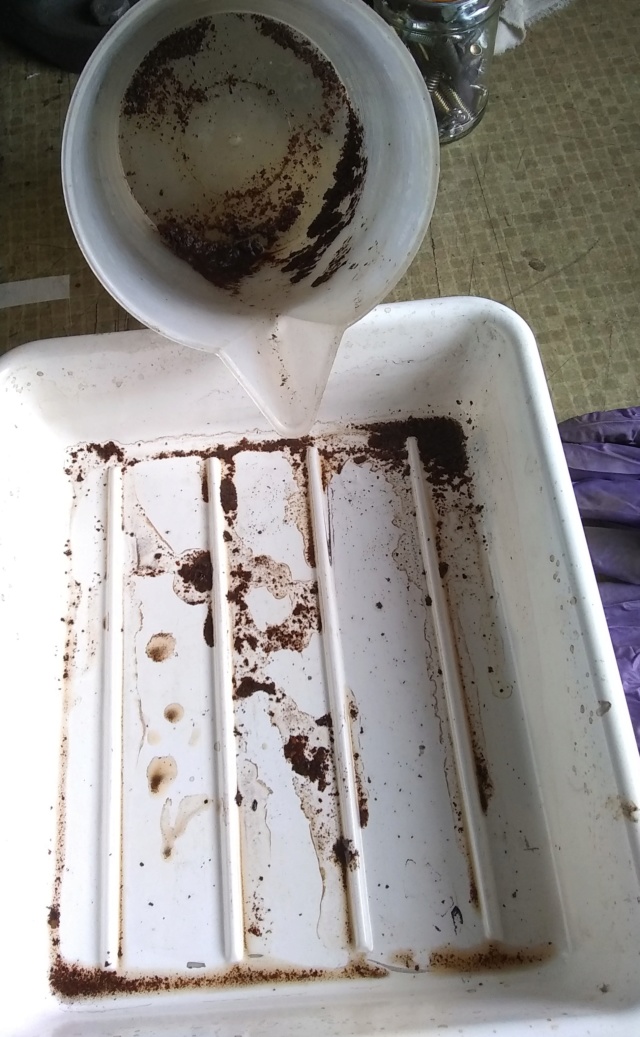
Moved onto the fuel tank......
First run of de-rusting the inside with vinegar (looking good, but will repeat):
Paint-stripper then wire-brushed and rinsed the outside:
Wire-wheeled: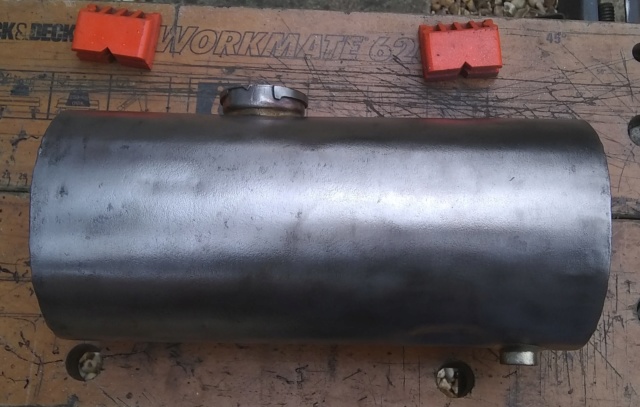
Pitting and dents evident that will be filled....
I then decided to smooth off the seams on each side of the tank (they were quite rough, as is evident on the second photo of this post), using the flapwheel on my angle grinder...... This progressed nicely until the grinder kicked-back and contacted the top surface of my left index finger (yes, I do have heavy-duty safety gloves and I stupidly did this WITHOUT them ). What an idiot I am.
Lots of blood...... Wife took me to the cottage hospital - seemed I may have contacted the bone, so was sent further afield to A&E after receiving a temporary dressing. Further examination showed exposed tendon, which, luckily, was missed and bone. The burned/abraded surface flesh was removed and the whole thing was cleaned out and steri-stripped - now I have to keep it straight until it heals from the bottom-up (granulation). All this was done, including an x-ray, within an hour of arriving (good old NHS an invaluable resource)
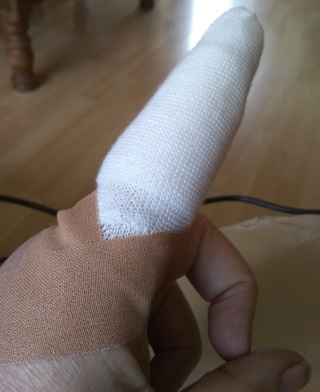
Banned from the garage for a while......
First run of de-rusting the inside with vinegar (looking good, but will repeat):

Paint-stripper then wire-brushed and rinsed the outside:

Wire-wheeled:

Pitting and dents evident that will be filled....
I then decided to smooth off the seams on each side of the tank (they were quite rough, as is evident on the second photo of this post), using the flapwheel on my angle grinder...... This progressed nicely until the grinder kicked-back and contacted the top surface of my left index finger (yes, I do have heavy-duty safety gloves and I stupidly did this WITHOUT them
Lots of blood...... Wife took me to the cottage hospital - seemed I may have contacted the bone, so was sent further afield to A&E after receiving a temporary dressing. Further examination showed exposed tendon, which, luckily, was missed and bone. The burned/abraded surface flesh was removed and the whole thing was cleaned out and steri-stripped - now I have to keep it straight until it heals from the bottom-up (granulation). All this was done, including an x-ray, within an hour of arriving (good old NHS
an invaluable resource)
Banned from the garage for a while......
Dougal- Born to be wild
- Posts : 30
Join date : 2016-09-28
Age : 61
Location : Herefordshire
Re: Villiers Mk10: Serial No. 522/182290
![]() by Dougal Thu Mar 21 2019, 14:47
by Dougal Thu Mar 21 2019, 14:47
Earlier on in the restoration, I removed the points and cleaned up the magneto plate etc:
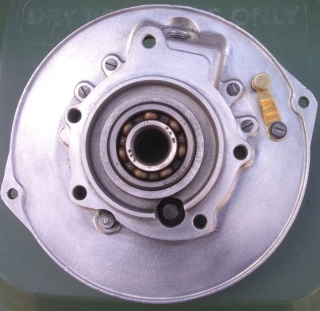
I'll re-wire the section from coil to points connector (it feels fragile).
I know there was a very healthy spark at the outset, but I was wondering what to look for in terms of electrical continuity and resistance values...... How do I test if the coil is still okay using a multimeter, for example?
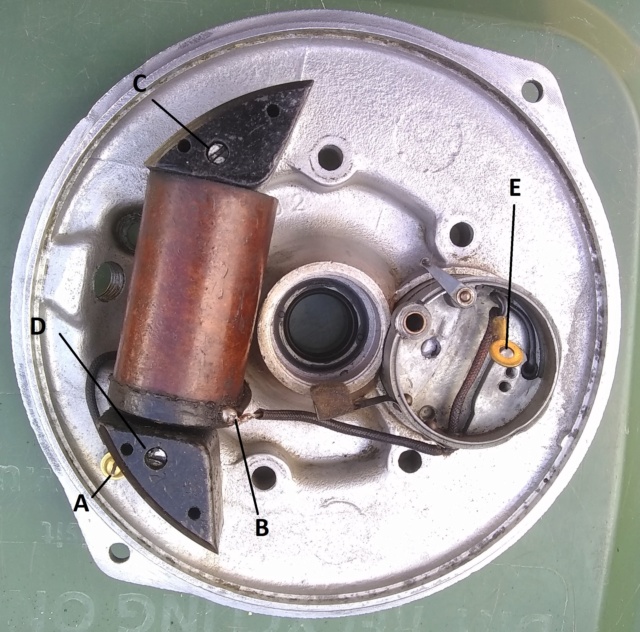
At 'B', there are two wires: one goes to the points box and connector 'E' and the other goes under the coil to the connector 'A' of the cut-off switch at the back of the plate (in first photo). What should the continuity be between 'C' and 'D', if any?
Dougal- Born to be wild
- Posts : 30
Join date : 2016-09-28
Age : 61
Location : Herefordshire
Re: Villiers Mk10: Serial No. 522/182290
![]() by Keith-PU8 Thu Mar 21 2019, 22:48
by Keith-PU8 Thu Mar 21 2019, 22:48
Villiers coil, test HT lead connection and earth, if you have no resistance at all, then it's normally dead, they can still work, but the spark is jumping inside the coil. B is the coils secondary winding wire, B wire also goes to points and the condenser that is hiding under the points box, A is an ignition kill wire that goes underneath the ignition plate, C&D are just screws that hold the coil in place, normally not seem, they are the other way up on all the ignitions I have.
Continuity be between 'C' and 'D', if any. That will be C, which is earth, to D, which is earth.
Continuity be between 'C' and 'D', if any. That will be C, which is earth, to D, which is earth.

Keith-PU8- Born to be wild
- Posts : 36
Join date : 2019-02-01
Age : 59
Location : Hertfordshire -

Re: Villiers Mk10: Serial No. 522/182290
![]() by Woodsman Fri Mar 22 2019, 09:30
by Woodsman Fri Mar 22 2019, 09:30
I think B is pointing at the LT terminal i.e. Primary winding if memory serves me correctly. Use multi-strand wire for replacement leads - solid wire will work harden with vibration. LT side should be about 2 ohms - will probably hardly register on a hobby class meter.
HT side should be around 4.5 to 5 thousand ohms. If it appears open circuit, try praying to deity of choice and applying soldering iron to the middle of the HT button. I've managed to resurrect a couple where the button had become detached. Don't hold your breath.
Bad luck with the angry grinder - I bet that smarts. I trust we will all take something away from your experience. I, for instance, threw away all my scratched and dirty safety specs and bought new - now I can see what I'm doing.
_________________
Regards Paul
Tha can alus tell a Yorkshireman - but tha can't tell him much.

Woodsman- Admin
- Posts : 2685
Join date : 2014-08-24
Age : 73
Location : God's own county
Re: Villiers Mk10: Serial No. 522/182290
![]() by Keith-PU8 Fri Mar 22 2019, 11:45
by Keith-PU8 Fri Mar 22 2019, 11:45
Sorry your right, B is the primary winding, no need to test that as it is a much thicker wire winding and just goes to earth anyway and is never usually a problem.
Best to test with an old style analogue meter, with no points or condenser fitted.
Best to test with an old style analogue meter, with no points or condenser fitted.
Keith-PU8- Born to be wild
- Posts : 36
Join date : 2019-02-01
Age : 59
Location : Hertfordshire -
Re: Villiers Mk10: Serial No. 522/182290
![]() by Dougal Sun Mar 31 2019, 18:56
by Dougal Sun Mar 31 2019, 18:56
The resistance between A and B and A and E is 0.3 Ohm.
To measure the resistance of the HT circuit, then, I probe between the 'button' on the coil and which connection?
Sorry.... Still learning.
Thanks.
To measure the resistance of the HT circuit, then, I probe between the 'button' on the coil and which connection?
Sorry.... Still learning.
Thanks.
Dougal- Born to be wild
- Posts : 30
Join date : 2016-09-28
Age : 61
Location : Herefordshire
Re: Villiers Mk10: Serial No. 522/182290
![]() by Dougal Sun Mar 31 2019, 22:09
by Dougal Sun Mar 31 2019, 22:09
Duh.... The connection A to B and A to E are effectively one long wire so should be very low resistance.
Where do I probe, then, to test the LT and HT circuits?
Where do I probe, then, to test the LT and HT circuits?
Dougal- Born to be wild
- Posts : 30
Join date : 2016-09-28
Age : 61
Location : Herefordshire
Re: Villiers Mk10: Serial No. 522/182290
![]() by Woodsman Mon Apr 01 2019, 09:07
by Woodsman Mon Apr 01 2019, 09:07
LT - from LT on coil to backplate
HT - from HT button to backplate
HT - from HT button to backplate
_________________
Regards Paul
Tha can alus tell a Yorkshireman - but tha can't tell him much.
Woodsman- Admin
- Posts : 2685
Join date : 2014-08-24
Age : 73
Location : God's own county
Page 2 of 2 • 1, 2
Page 2 of 2
Permissions in this forum:
You cannot reply to topics in this forum