
Kubota diesel KND3
Page 1 of 2 • 1, 2 ![]()

Kubota diesel KND3
![]() by Mark15 user Sun Aug 07 2016, 15:27
by Mark15 user Sun Aug 07 2016, 15:27
I've bought a new motor recently.
It's a single cilinder Kubota KND3 horizontal diesel engine.
Runs like a watch and needs a bit of TLC and a new trolley.
Seems a good project for the coming winter.

Don't know if it was a common engine in UK?
Best regards,
Steef

Mark15 user- A true Stationary engine owner

- Posts : 137
Join date : 2014-09-06
Age : 54
Location : Holland
Re: Kubota diesel KND3
![]() by Guest Sat Sep 03 2016, 22:21
by Guest Sat Sep 03 2016, 22:21
Jon
Guest- Guest
Investigation oil problem
![]() by Mark15 user Sun Oct 09 2016, 11:29
by Mark15 user Sun Oct 09 2016, 11:29
After the show in Tilligte where an oil problem occurred I've rechanged the oil.
When the engine was turned by hand the oil indicator didn't move upwards.
Even with a very short run it seems there was no oil pressure.
Therefore I've decided to strip the engine and have a closer look at the problem.
First action was to remove the flywheel to enter the oilpump.
After a week soaking in WD40 and penetrating oil the first attempt was done to remove the big nut.
I could use a big spanner from a local Mercedes truck dealer.
A few attempts later the nut came off without damage

To pull the flywheel off I've made a spanner from an old piece of oak and three threaded rods M10.
I've sprayed penetrating oil in the shaft and key hole for a few days.
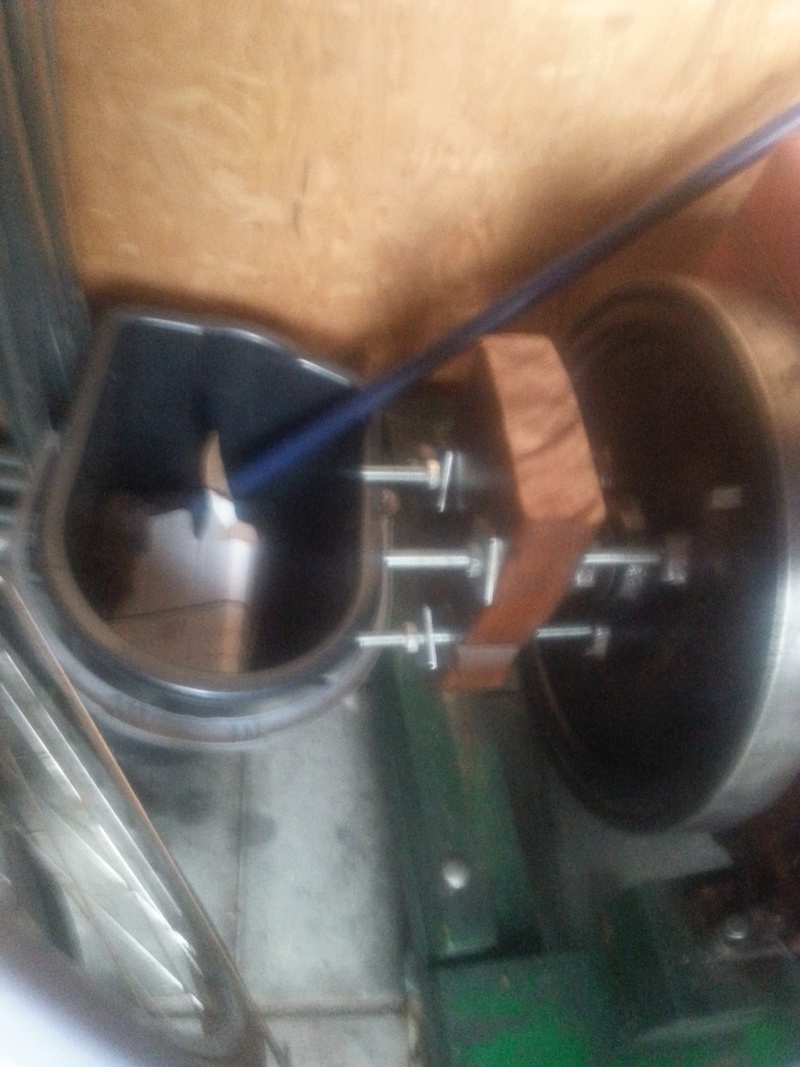
Then I did a first attempt. Was a little bit nervous that the tension caused by the threaded rods could crack the flywheel.
Luckily the flywheel came off after a little help with a heavy piece of wood
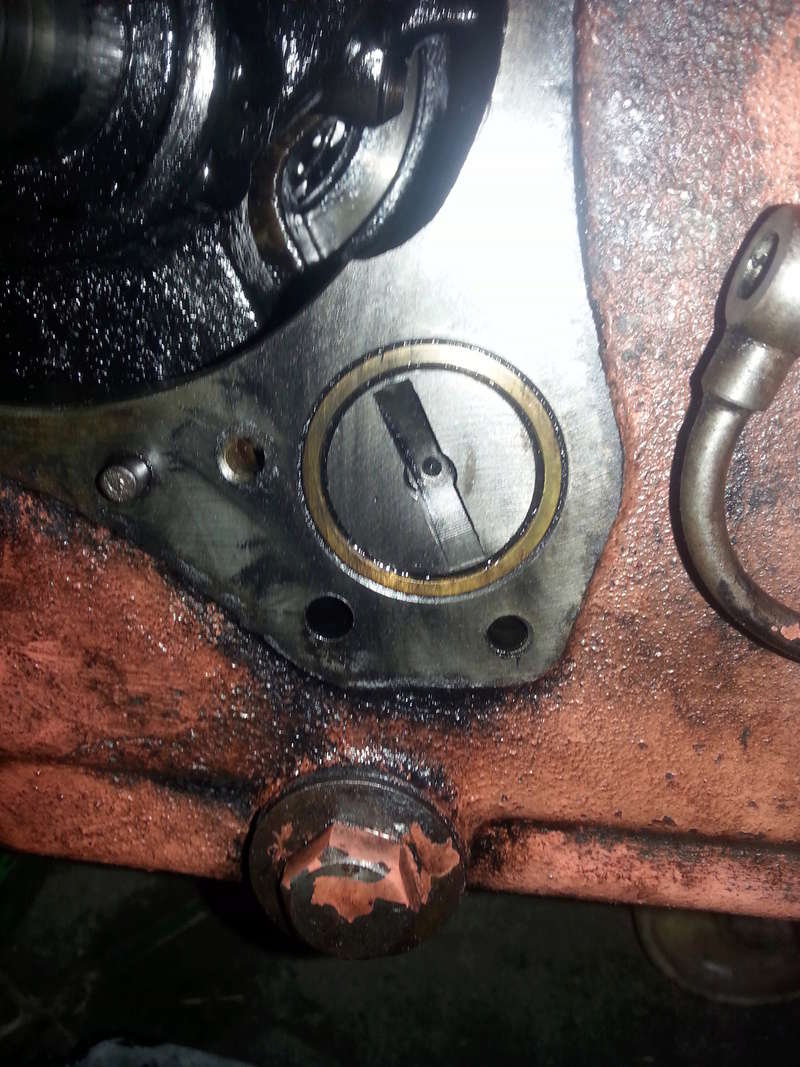
The cover plate of the oilpump was removed. The rotor from the pump didn't turn when I (carefully) cranked the engine.
After removing the oilpump rotor it seems that the shaft which fit in the camshaft is too short.


(Oilpump already removed on the pictures)
See the damage in the central bore; hope this can be repaired
Still have to remove the camshaft to check if the remaining part of the shaft is stucked in there.
Therefore the left side (fuelpump cover) has to be dismantled as well.
I hope that the nut in the camshaft is not worn out. Praying for the best.

Keep you updated.
Best regards,
Steef
Last edited by Mark15 user on Sun Oct 09 2016, 19:10; edited 3 times in total (Reason for editing : pictures added)
Mark15 user- A true Stationary engine owner
- Posts : 137
Join date : 2014-09-06
Age : 54
Location : Holland
Closer look at the oilpump connection in the camshaft
![]() by Mark15 user Mon Oct 10 2016, 21:33
by Mark15 user Mon Oct 10 2016, 21:33
Today I've removed the side cover of the engine to take a closer look at the oilpump connection in the camshaft.
First I had to clean a severe layer of old oil and grease from the bearing and the cover.
In the centre of the camshaft there is a circular shape; seems it's worn out.
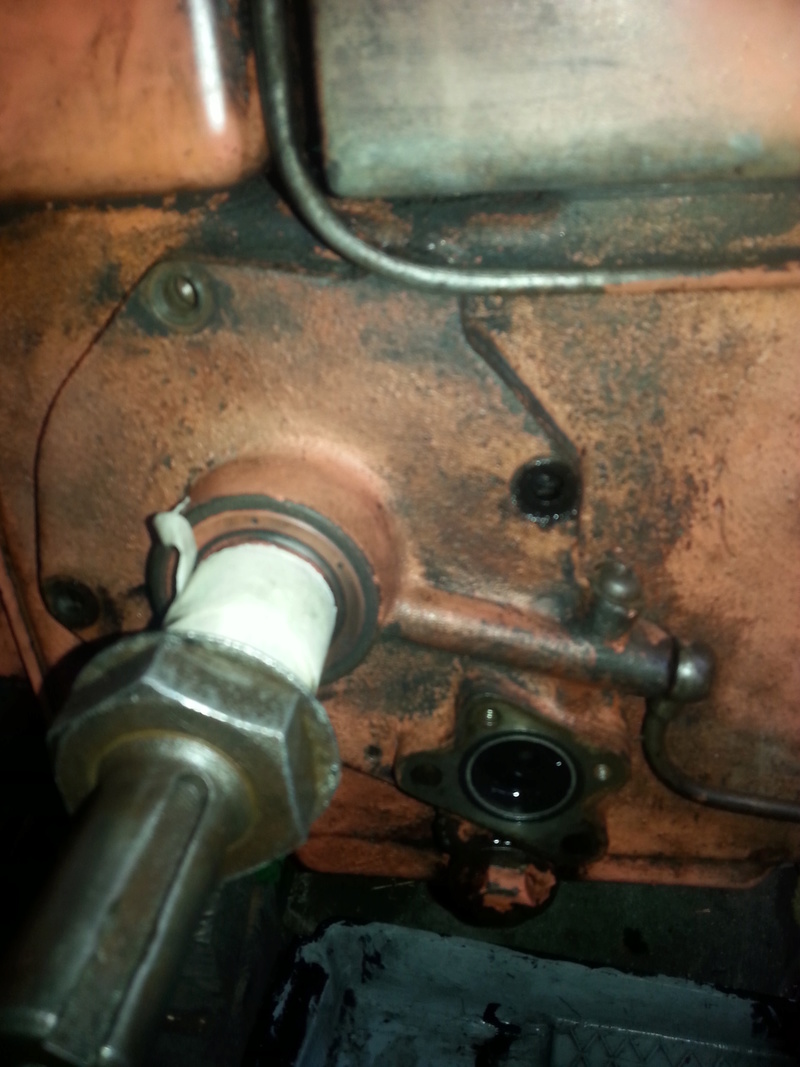
Still thinking about the best option to solve the issue.
Don't know if it's possible to weld on a layer of wear resistant material
Guess the camshaft should be (surface) hardened; risk of cracks
Didn't see any (second hand) camshaft on internet up till now.
Any suggestions or ideas?
Please let me know.
Best regards,
Steef Pronk
Mark15 user- A true Stationary engine owner
- Posts : 137
Join date : 2014-09-06
Age : 54
Location : Holland
Re: Kubota diesel KND3
![]() by Woodsman Tue Oct 11 2016, 08:45
by Woodsman Tue Oct 11 2016, 08:45
_________________
Regards Paul
Tha can alus tell a Yorkshireman - but tha can't tell him much.

Woodsman- Admin
- Posts : 2680
Join date : 2014-08-24
Age : 73
Location : God's own county
Dismantling and cleaning
![]() by Mark15 user Wed Nov 09 2016, 09:32
by Mark15 user Wed Nov 09 2016, 09:32
Been a while since the latest update.
Decided to strip the complete engine and give it a good internal cleaning.
This gives the opportunity to take a closer look at the current state of some critical parts.
A thorough cleaning of the inside was absolutely necessary.
All parts were covered with a thick layer of sticky black sludge.
The usage of brake cleaner and Dasty increased to a high level last weeks
Luckily there were some marks on the camshaft and crankshaft visible to determine the correct timing.
Got pictures from a partsbook which will help me with the (future) assembly.


Found issues sofar
- bigend bearing worn out (copper surface visible on some spots)
- piston pin bearing worn out ( abot 0,1mm play; guess this was the reason of the ticking sound while slowly crancking the engine)
- oil pump malfunction
- cilinder bushing surface no hohne pattern visible. Ridge on the bottom of the cilinder
Have to measure the crankshaft to determine if regrinding is possible.
Keep you posted
Best regards,
Steef Pronk
Mark15 user- A true Stationary engine owner
- Posts : 137
Join date : 2014-09-06
Age : 54
Location : Holland
Engine rebuilding the story continues
![]() by Mark15 user Wed Dec 21 2016, 19:49
by Mark15 user Wed Dec 21 2016, 19:49
Found some sparetime to continue the work on the engine.
Removed the oil seal ring from the RH cover and the conical roller bearings from the camshaft.
Conical bearing rings were removed in an earlier stage. (See the casette at the leftside of the camshaft in the picture below.)
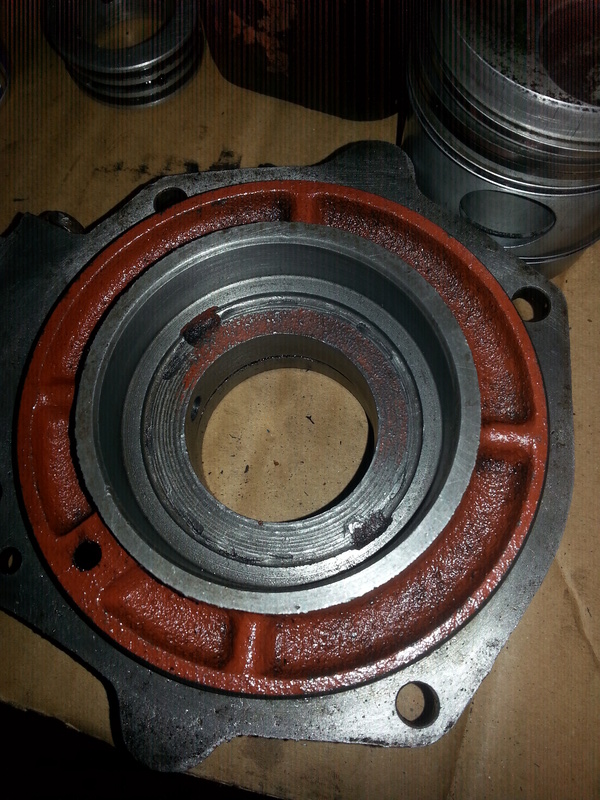


The type of roller bearing number is 30307.
Found SKF bearings on a webshop for a reasonable price.
Conrod bearing is worn out and piston pin bearing as well.

A local overhauling company will make a new piston pin bushing and will press it into the conrod.
To search for the conrod bearing continues.
Best regards,
Steef Pronk
Mark15 user- A true Stationary engine owner
- Posts : 137
Join date : 2014-09-06
Age : 54
Location : Holland
Re: Kubota diesel KND3
![]() by Mark15 user Mon Apr 13 2020, 16:33
by Mark15 user Mon Apr 13 2020, 16:33
Meanwhile the engine is mounted back together.
Found a used camshaft with a suitable nut for the oil pump.
Company Kosfain Taiwan provided me several parts like the big end bearings and conrod bushing.
Engine has made a first testrun as well.
Oil pressure problem is solved.
Now I need to do cosmetic work

Mark15 user- A true Stationary engine owner
- Posts : 137
Join date : 2014-09-06
Age : 54
Location : Holland
Work in progress
![]() by Mark15 user Sat Apr 18 2020, 09:49
by Mark15 user Sat Apr 18 2020, 09:49
Started cosmetic work on the watertank and flywheel.


Mark15 user- A true Stationary engine owner
- Posts : 137
Join date : 2014-09-06
Age : 54
Location : Holland
Re: Kubota diesel KND3
![]() by Mark15 user Tue Apr 21 2020, 21:47
by Mark15 user Tue Apr 21 2020, 21:47


Mark15 user- A true Stationary engine owner
- Posts : 137
Join date : 2014-09-06
Age : 54
Location : Holland
Re: Kubota diesel KND3
![]() by Woodsman Wed Apr 22 2020, 11:47
by Woodsman Wed Apr 22 2020, 11:47
_________________
Regards Paul
Tha can alus tell a Yorkshireman - but tha can't tell him much.
Woodsman- Admin
- Posts : 2680
Join date : 2014-08-24
Age : 73
Location : God's own county
Re: Kubota diesel KND3
![]() by Mark15 user Wed Apr 22 2020, 19:56
by Mark15 user Wed Apr 22 2020, 19:56
Thank you very much for your nice reply.
Really appreciate that and keeps me motivated.
Have applied the first layers of epoxy primer today.
Watertank needs minor detail work.


Mark15 user- A true Stationary engine owner
- Posts : 137
Join date : 2014-09-06
Age : 54
Location : Holland
Preparation for new color
![]() by Mark15 user Thu Apr 23 2020, 19:42
by Mark15 user Thu Apr 23 2020, 19:42
A lot of sanding - filling - sanding.
Step by step I'm getting there
In an earlier stage I've made some tests to get the right color.
Unfortunately the color scan made by my local paintshop did not meet my expectations. (Looked like the red color of a very old Ford Fiesta
I've seen pictures on internet from Kubota engines with a blue / grey color scheme.
Maybe a good alternative as the salmon color is quite odd.


Mark15 user- A true Stationary engine owner
- Posts : 137
Join date : 2014-09-06
Age : 54
Location : Holland
Re: Kubota diesel KND3
![]() by Mark15 user Fri Apr 24 2020, 18:24
by Mark15 user Fri Apr 24 2020, 18:24
Used the sunny afternoon to spray the engine block in the epoxy primer.
I've used Spraymax 1K epoxy spraycans. The nozzle can be turned to spray horizontal or vertical. Excellent solution for tricky spots.
See pictures from today,
Flywheel and left side of the tank need some minor filling.
Then the top coat will be sprayed.


Mark15 user- A true Stationary engine owner
- Posts : 137
Join date : 2014-09-06
Age : 54
Location : Holland
Re: Kubota diesel KND3
![]() by mattblack Fri Apr 24 2020, 21:19
by mattblack Fri Apr 24 2020, 21:19
_________________
Specialist in precision guesswork.

mattblack- Life Member
- Posts : 826
Join date : 2019-06-21
Location : Leicester, me duck...

Mark15 user- A true Stationary engine owner
- Posts : 137
Join date : 2014-09-06
Age : 54
Location : Holland
Re: Kubota diesel KND3
![]() by Mark15 user Thu May 07 2020, 16:43
by Mark15 user Thu May 07 2020, 16:43
See the pictures below.
Tank and watertank will be done tomorrow.


Mark15 user- A true Stationary engine owner
- Posts : 137
Join date : 2014-09-06
Age : 54
Location : Holland
Paint fuel tank and watertank finished!
![]() by Mark15 user Fri May 08 2020, 18:55
by Mark15 user Fri May 08 2020, 18:55
Today I've finished the paint work on the fueltank and watertank.
See attached the pictures.
Realizing that the fuel tank needs to be adjusted to be more in line with the watertank.
Hope you like the new colors.
Wish you all a nice weekend.


Mark15 user- A true Stationary engine owner
- Posts : 137
Join date : 2014-09-06
Age : 54
Location : Holland
Re: Kubota diesel KND3
![]() by Woodsman Sat May 09 2020, 10:19
by Woodsman Sat May 09 2020, 10:19

_________________
Regards Paul
Tha can alus tell a Yorkshireman - but tha can't tell him much.
Woodsman- Admin
- Posts : 2680
Join date : 2014-08-24
Age : 73
Location : God's own county
Re: Kubota diesel KND3
![]() by Mark15 user Sat May 09 2020, 11:51
by Mark15 user Sat May 09 2020, 11:51
Thanks again for your positive feedback.
Started to build up the engine.
Need some small bits en pieces but not that much.
See the pictures from this morning


Mark15 user- A true Stationary engine owner
- Posts : 137
Join date : 2014-09-06
Age : 54
Location : Holland
First testrun after paintjob
![]() by Mark15 user Sat May 23 2020, 08:44
by Mark15 user Sat May 23 2020, 08:44
Oil pressure is visible on the indicator
Mark15 user- A true Stationary engine owner
- Posts : 137
Join date : 2014-09-06
Age : 54
Location : Holland
First testrun after paintjob
![]() by Mark15 user Sat May 23 2020, 08:44
by Mark15 user Sat May 23 2020, 08:44
Oil pressure is visible on the indicator
Mark15 user- A true Stationary engine owner
- Posts : 137
Join date : 2014-09-06
Age : 54
Location : Holland
Re: Kubota diesel KND3
![]() by chrismac Sat May 23 2020, 09:56
by chrismac Sat May 23 2020, 09:56
Well done, a restoration project is not a race, its takes time to complete it when we can.
Chris
chrismac- A true Stationary engine owner
- Posts : 162
Join date : 2013-07-12
Age : 48
Location : Wick, Caithness
Re: Kubota diesel KND3
![]() by Woodsman Sat May 23 2020, 10:01
by Woodsman Sat May 23 2020, 10:01
_________________
Regards Paul
Tha can alus tell a Yorkshireman - but tha can't tell him much.
Woodsman- Admin
- Posts : 2680
Join date : 2014-08-24
Age : 73
Location : God's own county
Re: Kubota diesel KND3
![]() by Mark15 user Sat May 23 2020, 12:51
by Mark15 user Sat May 23 2020, 12:51
Thank you very much for your positive comments.
@Chris, this engine has 4HP at 2000RPM.
Realizing that almost four years have past since I've started this topic. Due to other priorities the restoration process was stopped at a certain point.
The current lock down period has given me the opportunity and motivation to continue the restoration.

Mark15 user- A true Stationary engine owner
- Posts : 137
Join date : 2014-09-06
Age : 54
Location : Holland
Page 1 of 2 • 1, 2 ![]()
» Issue unburned oil out of exhaust Kubota KND3
» Dead red diesel??
» Id this lister diesel
» Marshall Semi-diesel
|
|
|